VMware’s vCenter Server causes too many issues when ran on Windows Server. How much I fear clicking the Windows update button and crossing my fingers every reboot. In addition, the logs do not indicate a clear reason why it did not start. To solve this issue, I decided to run vCenter Server Appliance (vCSA) 6.5 as a virtual machine (VM) on Workstation 10.
Environment
- Windows Server 2012 R2 (All updates applied until KB4483187)
- VMware Workstation 10 (10.0.7 build-2844087)
- vCSA 6.5 (VMware-VCSA-all-6.5.0-10964411.iso)
Requirements
VMware has a couple of requirements, and I have made my own recommendation list below for a smooth installation process.
- Use a fully qualified domain name (FQDN) for vCenter
- Configure DNS server on Windows Server for forward and reverse domain name service (DNS) lookup
- Enable “synchronize guest time with host” on VM
Steps for Installation
Assuming Windows Server with AD DS and DNS server has VMware Workstation 10 installed and the user has already downloaded the vCSA iso file, take the following steps to successfully run vCSA.
1. Extract ova from iso
Double click on the iso or mount by left clicking the file. Then, extract the ova by navigating to vcsa folder.

2. Import ova to Workstation 10
Double click on the extracted ova and accept the license agreement. Wait until it finishes loading. DO NOT START UP the VM yet.

3. Edit vmx
My VMs’ files exist under C:\Users\Administrator\Documents\Virtual Machines. Double click on the VCSA folder and open the vmx file with a text editor. Append the following lines making changes to fit your environment.
guestinfo.cis.deployment.node.type = “embedded”
guestinfo.cis.appliance.net.addr.family = “ipv4”
guestinfo.cis.appliance.net.mode = “static”
guestinfo.cis.appliance.net.pnid = “vcenter.apicli.com”
guestinfo.cis.appliance.net.addr = “172.16.100.10”
guestinfo.cis.appliance.net.prefix = “24”
guestinfo.cis.appliance.net.gateway = “172.16.100.254”
guestinfo.cis.appliance.net.dns.servers = “172.16.100.1”
guestinfo.cis.appliance.root.passwd = “Cisco123”
guestinfo.cis.appliance.ssh.enabled = “True”
guestinfo.cis.deployment.autoconfig = “False”
guestinfo.cis.ceip_enabled = “False”
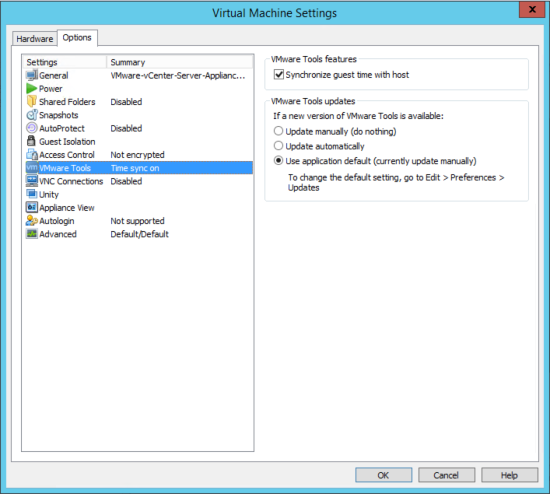
4. Edit VM configuration
Right click the VM and choose “Settings…”. Choose the “Options” tab, click “VMware tools”, and enable “Synchronize guest time with host”.
5. Run VM
Finally run the VM, and wait until the FQDN and IP address appear on a blue colored GUI. Even if the prompt asks for a login, that means the installation needs a bit more time to complete. My machine takes about 20 minutes to complete.

6. Continue installation process accessing port 5480
During the installation process, the wizard will ask for NTP information. Choose synchronize with machine as specifying a NTP server did not work for me.

7. Wait until the installation process finishes
Everything should be up and running in an hour.

